How to Adjust a Rifle Scope
December 15, 2021

Whether you’re teaching your kids how to hunt or replacing an old scope for one of your seasoned buddies, a new rifle scope makes a wonderful gift idea for hunters. However, like most new gear, a scope comes with some initial steps to get it up to snuff. But just what kind of steps does a scope require to make it 100 percent satisfactory? Discover how to adjust a rifle scope, from the lens to the turrets and more, before it’s taken on the field.
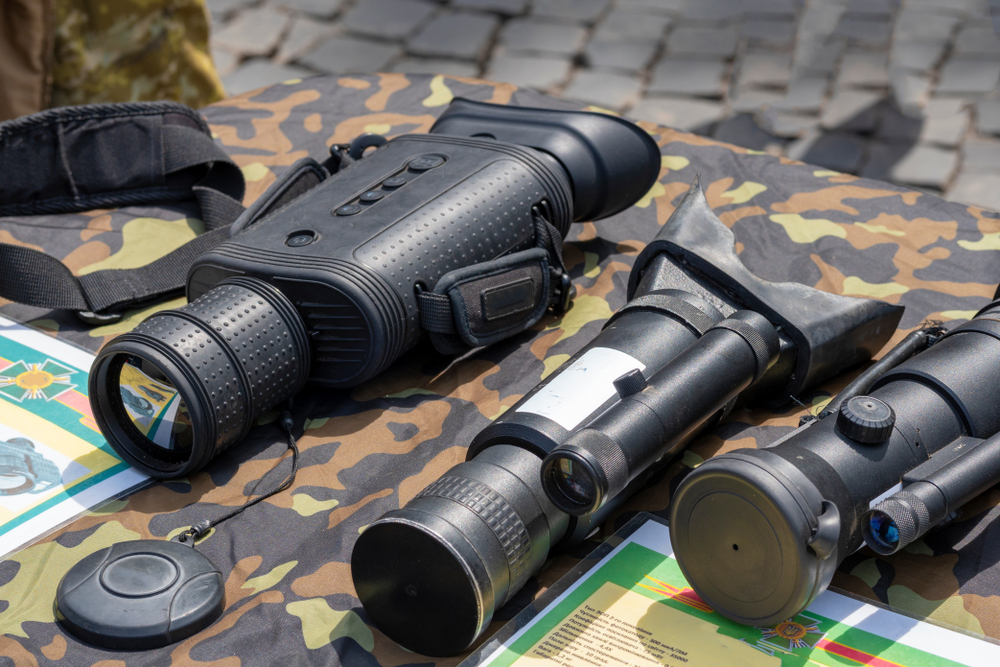
Know Your Rifle Scope Parts
As we break down how to adjust a rifle scope, specific parts will be mentioned. To better understand the steps, it’s essential to become familiar with a scope’s central components, such as the ocular lens, the magnification adjustment and turrets.
Here’s what you’ll be adjusting and working with:
Scope Body – This one is pretty self-explanatory. Used to aim, this is the main tube of the scope where the other parts are attached.
Ocular Lens – This lens rests in the ocular housing and is closest to the eye when looking through the scope.

Objective Lens – On the opposite end of the ocular lens is the objective lens, which faces the target. Typically, and similar to a camera, the objective lens is larger.
Ocular Housing – The ocular housing is the “eyepiece” of the rifle scope where the ocular lens rests, along with the ocular focus adjustment.
Ocular Focus Adjustment – This focus adjustment is the mechanism used to focus the reticle crosshairs to your eye. The entire ocular focus housing turns on some rifle scopes, whereas others may have only an adjustable outer section around the lens.
Magnification Adjustment – Fairly straightforward, this part tweaks the magnification power.
Turrets – These knob-like parts are used to fine-tune the elevation and windage of a shot. Jutting out from the scope body, they are exposed and easily accessible, allowing you to adjust while aiming. Sometimes, turrets are capped for protection.
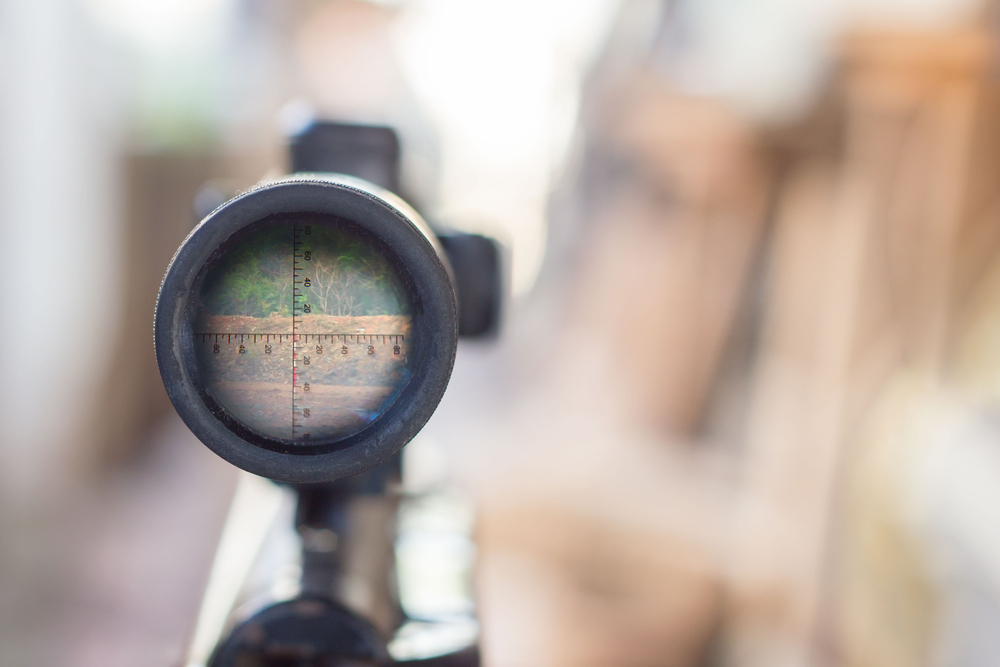
Reticle – These are the cross-hairs you use to aim when looking down the scope. A long-range shooting scope is highly detailed, providing references to elevation and windage holds.
Parallax Adjustment / Target Focus – Lastly, this scope part adjusts to align the target image with the reticle’s focal plane. This adjustment ensures that the images of the two objects you are looking at do not shift, allowing the target to come into a crisp focus.
You can find a turret-like knob called a “side focus” or “side parallax” on high-end scopes. Other times, they’re merely found as an outer ring design called an “adjustable objective scope” around the objective lens.
Zeroing: How to Adjust a Rifle Scope’s Elevation
An elevation adjustment is used when you need to change where a bullet strikes. Since bullets have an ever-so-slightly arc trajectory, a rifle scope’s aim has a bullet drop, which increases the farther you are from the target’s position. To counterbalance this bullet drop, you will have to fine-tune the elevation adjustments, “zeroing” the scope to your rifle with each change in distance.

Basically, “zeroing” the scope will guarantee your point of aim (POA) and point of impact (POI) are perfectly aligned, ensuring your bullet strikes exactly where you intend. You should always make sure a new scope is “zeroed.” Also, it’s good practice to check it once a season or if your rifle takes an unintentional beating as you drive through some backroads. While you can protect it with a rifle case, it’s still a good idea to make sure your elevation is “zeroed” before taking down a deer.
To adjust the scope’s elevation and move the POI up, you simply turn the scope’s elevation turret in the “up” direction. For many scopes, this means rotating the turret counterclockwise. As you turn the turret, listen for a clicking sound. Each click signals an angular measurement known as the Minute of Angle (MOA), often representing one-quarter of an inch per 100 yards. However, be sure to inspect your personal scope to be sure.
The combination of this clicking noise and an exposed turret allows you to make elevation adjustments while peering through the scope and holding position. Just remember the expression “righty tighty, lefty loosey” to help you understand that turning the turret counterclockwise raises the POI elevation, and clockwise lowers the POI.
Sometimes, your turret adjustments can appear to be out of whack, working in reverse of the way they are designed. If this happens, it means you also need to adjust your reticle. When you turn the turret up, the reticle should go down inside the scope, and then you should manually raise or lower the rifle accordingly.
How to Adjust a Rifle Scope’s Windage
Windage adjustments are similar to your scope’s elevation adjustments. The key difference is that while elevation is intended for raising and lowering a bullet’s impact, windage is meant for adjusting the bullet left to right. As the name implies, the windage adjustment helps combat strong wind conditions that could offset the bullet from the desired target.
Many shooters leave the windage alone, focusing more on the elevation turret. While at great distances, strong winds can push a bullet mid-flight, touching the turret isn’t necessary. Instead, many shooters find it more advantageous to simply adjust the rifle itself. One reason is that strong winds can often get squirrely, constantly shifting direction. Changing a turret with each wind gust is much more challenging than ever-so-slightly shifting your rifle with your hands.
The windage turret is often found on the side of the scope body. Like the elevation turret, the windage turret has an easy way to remember how it’s designed to be adjusted. Use the mnemonic device: I don’t want to be left out, so I’ll be right back.
In other words, rotating the windage turret out or away adjusts the scope left. And turning the turret back toward you adjusts the scope right.
How to Adjust a Rifle Scope’s Target Focus
When your scope is misaligned, it can result in what is called a parallax. What is parallax exactly? To better understand parallax, perform this simple at-home demonstration:
With a raised index finger, extend your left arm in front of you. Do the same with the right arm and hand, except align it somewhere between the extended left hand and your eyes. (You should be seeing two fingers, aligned but at different distances.) Keeping your fingers steady, move your head from side to side. Do you notice how your fingers shift, too? That shift is what’s known as parallax.
Obviously, parallax is not something any shooter wants. It can result in many missed targets and a frustrating day at the range. So do yourself a favor and adjust the target focus. Here’s how to do it:
Parallax is often caused by moving the rifle barrel’s orientation, which results in a shift of the bullet’s path. Focusing on the reticle, adjust the target focus. Move the scope’s focal point of the image to align with the reticle. When you align both the reticle and the target’s image along the same focal plane, it means it’s in focus and, therefore, no parallax effect.
Don’t confuse the two terms “adjustable objective” and “adjustable parallax,” as they mean two different things. An “adjustable parallax” is something you want on a scope. On the other hand, having an “adjustable objective” on an adjustable parallax scope is undesirable. Instead, you should seek out a side-focus/side-parallax knob. Try not to confuse these features when searching for a scope.
How to Adjust the Rifle Scope’s Eyepiece
With all the turrets adjusted, you still need to focus the eyepiece. Sadly, this is one of the most common mistakes even a professional shooter tends to make. Not only do some shooters not know how to tweak the eyepiece correctly, but some don’t even know the adjustment option exists.
Make sure your scope is set up correctly and focused so you see the reticle crisp and clear. Only when you can see without squinting or straining should you bring the target into the reticle to make it clear and without that double-vision parallax.
Here are step-by-step instructions on adjusting the eyepiece. Grab a friend or someone to help to make it easier.
- Mount your scope to the rifle properly and then stare at a light-colored object nearby.
- Get into a normal position behind your rifle. Make sure you don’t have to move your head to see through the scope. If you do, it means you need to adjust the scope to fit you.
- Get your companion to hold a sheet of white paper roughly one foot in front of the scope as you look through and close your eyes for a few seconds.
- Opening your eyes, look at the reticle and close them once more for roughly two seconds. (Avoid keeping your eyes open too long, as it can strain to focus on the reticle.)
- Using your buddy again, have them tweak the ocular focus adjustment at least one-half a revolution.
- Open your eyes for two seconds, declaring if the reticle is “better” or “worse.”
- Repeat the exercise, turning the ocular focus adjustment in both directions until you get it spot on.
How to Adjust Your Scope’s Magnifications
Look for a ring in front of the ocular housing that allows you to adjust the magnification. On adjustable power scopes, you can use this magnification adjustment to change the target image scale, making it larger or smaller. Keep in mind that some rifle scope reticles increase the size proportionate to the target (First Focal Plane). In contrast, other scope reticles stay consistent throughout the magnification (Second Focal Plane).
What does this mean, exactly? Let’s explore these planes more in-depth:
First Focal Plane (FFP) rifle scopes have a reticle that adjusts with the target image. Essentially, you can use the reticle markings for measurement at any magnification setting. One advantage of the FFP is that it's useful for range estimation using Mils. However, the disadvantage is that the reticle can appear overly thick or thin at some magnification ranges. FFP scopes are more ideal for long-range shooters.
Second Focal Plane (SFP) rifle scopes don’t adjust the reticle, only the target image. Basically, it means the reticle is already an appropriate size for aiming. However, this can cause issues when you try to use graduated marks on the reticle at an incorrect magnification power setting. Should you have Mil or MOA reticle marks, more than likely, they will only be equal to their true size at full magnification power. Lowering the magnification setting keeps the marks the same size, but makes the image smaller, which is no help for an accurate aim. In general, an SFP is advantageous, allowing you to see the reticle in low light and low power magnification.
When it comes to magnification adjustments, avoid using the full power constantly. Many shooters tend to aim better at a lower power, taking advantage of less visible movement in the image and spotting your target effortlessly.
The Perfect Aim Takes Patience
Learning how to adjust a rifle scope takes patience. These adjustment steps are more specific to the turrets and pieces directly on the scope body, which takes effort to tweak just right. However, there are a few other adjustments you should make before attaching the scope itself. Before you even consider mounting the scope to the rifle, make sure to choose the suitable fitting along the rifle. For example, you can elevate the height of your scope, its position forward or rearward, as well as level it if needed.
Once you have everything set up how you like, you should be able to hit your mark. Make sure to check on your adjustments once a season or when you feel the aim is unusually off. Carrying your rifle across rough terrain can also shift your scope settings. Securing it in a gun case does wonders, but also remember to give it a good once-over before shooting something that moves.

SIGN UP FOR EXCLUSIVE OFFERS
Sign up for our newsletter and get exclusive access to new product launches, special offers and much more.
RELATED BLOGS